2.3 Managing
your Forms
Year-End Forms allows you to View, Edit, Delete, and Print
any of your forms. This may be useful to correct forms, print individual forms,
or review an employee/recipient’s tax form. As indicated above, Forms may be
accessed through the Forms icon within the navigation bar.
![]() The
Task-Driven Homepage (detailed further in Section 2.4) also
features a ‘My [Tax Forms]’ button. This button will navigate you to the ‘View
Forms’ page as well.
The
Task-Driven Homepage (detailed further in Section 2.4) also
features a ‘My [Tax Forms]’ button. This button will navigate you to the ‘View
Forms’ page as well.
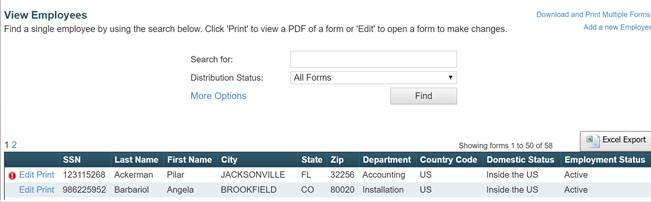
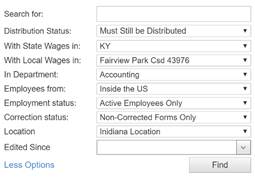
2.3.1 Viewing Forms
From this page, you can search for any form using a variety of
filters. Clicking ‘More Options’ allows to you search by an expanded set of
options based on the formset type. Clicking ‘Find’ will return a list of each
of your employees/vendors found under the search criteria. At this point, you
can export the list to Excel or edit and print a single form.
2.3.2
Print
an Individual Form
![]()
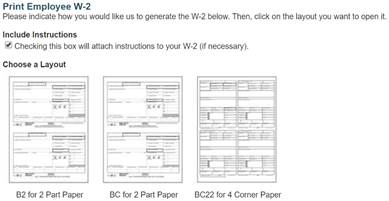
To print an individual employee/recipient’s form, select the
‘Print’ link next to the form you wish to print. This will generate the tax
form as a PDF document, which may be printed directly or saved as a PDF
document for printing later. This option will also allow you select from the
multiple form layout options that Year-End Forms supports and that has been
enabled within the Forms setting.
For the W-2 specifically, this includes:
·
B2 (two Copy Bs) for 2-part paper
·
BC (one Copy B and one Copy C) for 2-part paper
·
BC22 for 4-part paper (one Copy B, one Copy C,
and two Copy 2s).
You may find this option useful to print an
employee/vendor’s corrected form as well. Separate templates are available for
corrected forms, as needed.
2.3.3 Edit Forms
There are many reasons that an administrator may wish to
make edits to employee’s tax form. For example, you may discover there are
fields that were incorrect in your accounting package, or your employee may
report a problem and you have not given them access to change it themselves.
To edit a form, you must first search for it on the ‘View
Forms’ page as described in Section 2.3.1 above.
Once you have located the form, click on the ‘Edit’ link next to the form you
wish to edit.
![]()
Your form will appear populated with the data for the
employee/vendor you selected. Depending on the form type, multiple links will
be provided to edit the form’s information. Any warnings or validation errors
for the form should be listed at the top of the screen. To edit a section of
the form, depending on formset type, find the nearest 'Edit' link that
describes what you want to edit or click within the text field you wish to
edit.
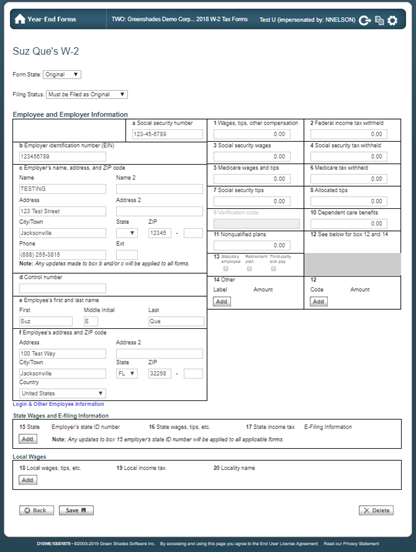
For example, if you want to edit an employee's wages, you
should click within Box 1 and edit the data. You may also edit other
information, such as Login & Other Employee Information (needed for
employee access) by clicking the link and editing the information within the
pop-up modal.
Once an edit is
saved, it will be reflected everywhere. This includes the form that you are
viewing, the form that the employee may electronically view through
GreenEmployee.com, and the E-File that will be submitted, once it is due. It
is, however, important to note that any changes/edits made to tax forms within
the Year-End Forms portal will not sync back to your accounting package.
A form may also be
deleted through the ‘Edit Form’ page within the bottom action bar. It is
important to note that on confirmation of deleting a form, it will be
irreversible.
![]()
An audit of all changes
made to any forms within your formset is stored by Year-End Forms. This
includes tracking of changes made by recipients, as well as form edits by
administrators. You can view this report by clicking on the ‘Reports’ button on
the task-driven homepage and clicking on the ‘Changes
made to forms’ report. You may also
filter this report by who made the change and export it into Excel. For more on
reports, see Section 5.
2.3.4 Making
Form Corrections
While Section 2.3.3 details
how to make edits to your tax forms, this section specifically details how to
make form corrections for W-2 formsets.
If you need to make corrections to a form/forms for your
employee(s)/vendor(s), Year-End Forms has several options to support your
needs.
2.3.4.1
W-2
Corrections
For W-2 forms, you must send a
corrected form to your employees if you make a change to their form
information/data post-distribution. Based on distribution and filing status of
the employee and the formset, Year-End Forms will automatically determine the
correction status of an employee’s form and display it as such at the top of
the employee’s ‘Edit Form’ page.
On proceeding distribution through Print an Individual Form, Download and Print, Mail Service, or Employee
Access view, the appropriate, compliant form will display/generate based on
the form’s status below.
There are two categories that a
correction to a W-2 form may fall into:
1)
Form State:
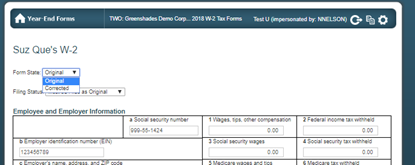
§
Form State Original:
No significant changes have been made to an employee form that the IRS
would identify as needing a correction form prior to distribution.
§
Form State
Corrected: A change is made to an employee’s form that the IRS has
identified as a significant change that the employee should have accurately
reflected on their W-2 form as to accurately report on their 1040 return.
Example: Employee SSN, Employer EIN, Box
1-20 data
2)
Filing Status:
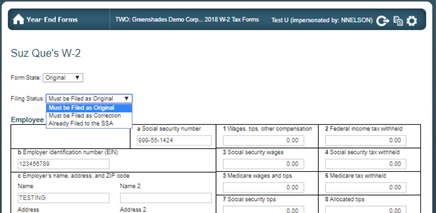
§
Must be Filed as
Original – This form will be included in the next original filing
created and sent to the SSA.
§
Must be Filed as
Correction- This form has detected a change made to an employee’s form,
post-filing, that the IRS has identified as a significant change that the
employee now requires a correction filing to detail what was Previously
Reported on the originally distributed form and what the Correct Information is
that will be re-E-filed and reported to the SSA.
Example: Employee SSN, Employer EIN, Box
1-20 data. This form will be included in the next correction filing created
and sent to the SSA.
§
Already Filed to the
SSA: This form has already been included in a filing. This form will not be included in any future filings.
2.3.4.2
1099-Misc
Corrections
For 1099-MISC forms, you must send
corrections to your vendors if you make a change to a vendor's TIN or any wage
information. When an edit is made to a vendor’s form, mark the form as
Corrected using the checkbox in the bottom right-hand corner. If the form has
previously been distributed and/or filed, thus requiring the correction, this
section will display when the form was last issued/distributed.

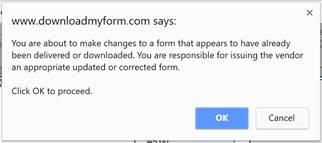
Year-End Forms
recognizes if the form has been previously distributed and on ‘Save’ will
display a confirmation modal to indicate to the administrator is responsible
for redistributing the corrected form.
2.3.5 Manually
Add a New Form
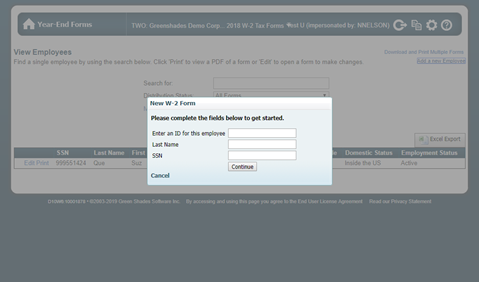
You
may manually add a new employee/recipient to this formset by clicking the ‘Add
a new Employee’ link from the ‘View Forms’ page. The ‘New W-2 Form’ modal will
capture the employee ID, Last Name, and SSN. Click ‘Continue’ to create the new
tax form and manually enter the employee’s personal and reportable tax
information.
This
new form will now be included in formset totals, distribution batches (if
selected), and original E-File.
For additional support please contact us.
(888) 255-3815 ext.1