About the Greenshades
Year-End Forms Process
The Greenshades Year-End Forms process uses a combination of
software, websites and government E-File services to ensure that employers can
complete all of their year-end tax form requirements
quickly and easily.
Most administrators have W-2s, 1099s, 1095-Cs, T4s, or other
forms stored in a corporate accounting package or perhaps manually
tracked/recorded in Microsoft Excel. The uploaded data, through either tracking
method, will be generated into digital tax forms, which can be edited, accessed
electronically by employees/vendors (as form type permits), automatically
printed and mailed by Greenshades, and/or E-Filed to the appropriate government
agency.
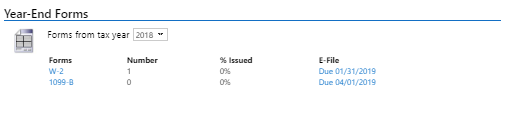
Year-End Forms is organized into formsets.
A formset contains all forms of a specific form type
(W-2, 1099-Misc, 1095-C, etc) for any individual
company and specified year. For example,
“Fabrikam 2018 W-2 forms” and “Contoso 2018 1099-MISC
forms” are each an individual formset that are
uploaded, accessed, and managed independently.
1 Getting
Started with Year-End Forms
1.1
Accessing
the Year-End Forms Portal
1.1.1 Existing
Administrator Account Access
If
an existing administrator is completing the ‘Create Year-End Forms’ wizard from
the Tax Filing Center, they will be
provided a direct link to their online formsets
(either through product or through an email). The formset
pages may also be bookmarked from a web browser for easy access at a later time.

If
an existing administrator has completed a formset upload
through Microsoft Excel or otherwise, they can access the formset(s)
by signing in with their administrator credentials through
GreenshadesOnline.com
1.1.2 New
Administrator Account Creation

If an administrator is new and has never logged into
GreenshadesOnline.com, they will need to create an account before uploading or
managing accessible formsets. Administrators can
create their account at GreenshadesOnline.com by clicking the blue ‘First time
here or need password help?’ link.
Completing the steps through this link will send the
administrator an email with a link to create their account. The administrator
should complete the following steps to successfully create their account:
1.1.2.1
Password
Setup
This is the password the
administrator will use to log in to GreenshadesOnline.com in the future to
access company workspaces and formsets.
Minimum password requirements may
be set up and required to comply in order to continue.

1.1.2.2
Security
Question Setup
Two security questions will be required
to set up and will be used if the administrator needs to reset their password
in the future.

1.1.2.3
Security
Image Setup
This security image chosen will be
displayed when an administrator logs into GreenshadesOnline.com, so they know
they are at our secure website. If the displayed security image is different
and does not match the administrator selected security image, ensure you are
signing in through the authentic GreenshadesOnline.com sign-in portal and your
credentials are correct.

1.1.2.4
Success
Once the administrator has
successfully created their account, they will log in with their email address
and password.

![]() What happens if an administrator gets locked out of
their account?
What happens if an administrator gets locked out of
their account?
If an administrator gets locked out of their account,
they will need to reset their password. The administrator will follow the steps
below to reset their password.
![]() How do administrators reset their passwords?
How do administrators reset their passwords?
Administrators
can reset their password at any time using the same blue
‘First time here or need password help?’ link at GreenshadesOnline.com.
An
administrator’s password and security questions can also be managed once logged
in to GreenshadesOnline.com at the ‘Account Settings’ link in the top right-hand
corner.
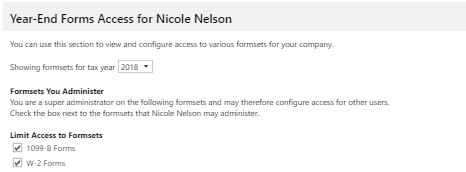
1.1.3
Controlling
Administrator Access
Administrator Access settings for formsets
can be managed through:
GreenshadesOnline.com à
Access Settings à
Administrator Access à
Access Control.
Formset access may be granted at a
Super Administrator level, which will allow the selected administrator to
access and manage all formsets associated with the
given workspace, or limited access may be set to restrict access to only specific
formset types or for specific years.
While
the Access Control settings give full control to administrator access rights,
during the upload formset process, either through the
Tax Filing Center (Section 1.2.1 –
Year-End Forms Wizard à Choose
Payroll Administrators step) or through Microsoft Excel (Section
1.2.2
– Import Forms Wizard à Security
step), you will be prompted to designate which administrator(s) should have
access to the new formset once uploaded.
1.2 Uploading
Forms
There are multiple ways to upload your forms into a Year-End
Forms formset based on the accounting package you use.
This guide will walk through uploading through the Greenshades Tax Filing
Center (Section 1.2.1) and by using the
Microsoft Excel (Section 1.2.2)
option.
1.2.1
Uploading
forms through Greenshades Tax Filing Center
If you
already have the Greenshades Tax Filing Center installed and operating against
your payroll data, you may use the Tax Filing Center to import your forms to the
Year-End Forms portal. The Year-End Forms Wizard supports many form types. The
following instructions are provided for W-2s. Uploading forms of other form
types follows a similar path.

The ‘Year-End Forms’ wizard will ask what type of form you
wish to import for and, depending on the type of form and your accounting
package, may also ask you questions about how you would like your forms
imported.
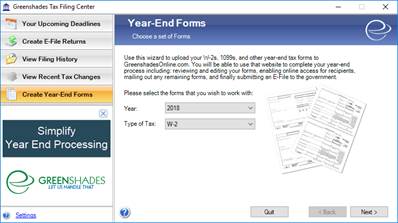
Once you have selected the form type you wish to import, and
the appropriate year, click ‘Next’.
Next, you may be asked to
combine multiple GP companies, if applicable. Clicking ‘Yes’ will provide a
table of companies you may want to combine.

Once you have selected how you want the forms to be treated,
you will be provided the totals for the forms. Please verify that these totals
represent the form data you wish to upload to Year-End Forms. The next step is
to begin the upload process.
The upload process may take anywhere from 2-5 minutes based
upon the amount of forms you are uploading. You may need to allow for a longer
upload time based on size of file, amount of data, and internal internet
connection.
When the forms have
sucessfully imported, you will see a confirmation and be asked to click ‘Next’
to continue.
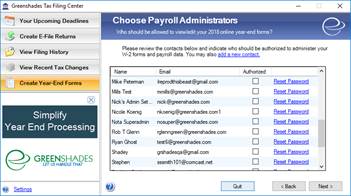
Once your forms have been uploaded, you will need to grant
administrator access to those forms. Check the checkbox in the ‘Authorized’
column next to each administrator who should have access to those forms. If an
administrator needs to be added to this list, click the ‘Add New Contact’ link.
If an existing administrator needs to reset their password, click the ‘Reset
Password’ link to do so.
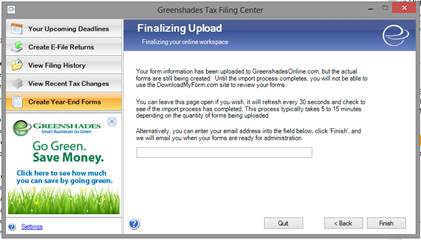
Your forms are being uploaded. Click the link provided on
this page to direct you to the Year-End Forms portal. You may now click the
‘Finish’ button to close the Greenshades Tax Filing Center or, alternatively,
provide an email address to receive a confirmation email when your upload has
successfully completed.
1.2.2
Uploading
using Microsoft Excel
If you do not have the Greenshades Tax Filing Center
installed, you may upload your forms through a Microsoft Excel format (.xls or.xlsx format). To upload your forms, download and
complete the Microsoft Excel template file tailored to the type of form you
want to upload.
You may click the link provided below or go online to either
GreenshadesOnline.com to access the Excel templates per form type. Either way,
you will finish in the Year-End Forms portal.
Click here to
download a Microsoft Excel template file
Enter your data into the Excel template you have downloaded.
Make sure that you do not modify the columns, column headers, or formatting, as
this may render the format incompatible for importing your data into the
website and cause an error. Be sure to follow the instructions in the yellow
boxes on each tab of the Excel. There
are comments in each column’s header cell. Hovering your mouse over them will
provide the proper data format, whether it is required, and the description.
Once you have populated the Excel template with your
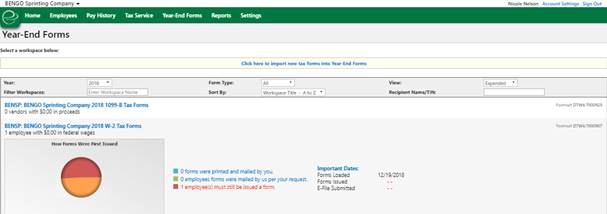
employee/form data, navigate to the Year-End Forms import wizard by:
1.
Logging into your GreenshadesOnline.com account
2.
Click on the ‘Year-End Forms’ tab within top
navigation
3.
Click the ‘Click here to import new tax forms
into Year-End Forms’ link centered at the top of the page
You will now begin the importing process. Year-End Forms
will first gather information about your company. If you have previously
uploaded to Year-End Forms, you may use your existing company information by
selecting your company from the drop-down list.
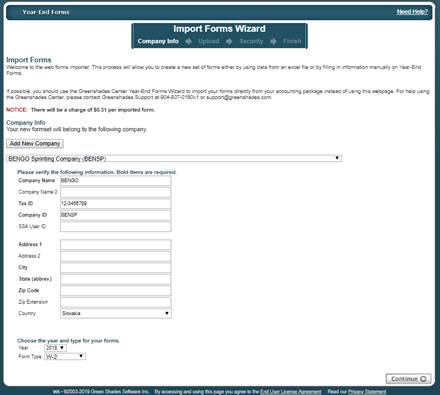
This functionality
will allow you to add new companies ahead of importing, if needed.
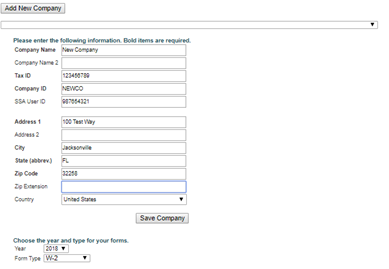
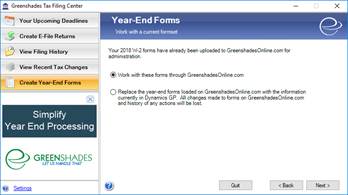
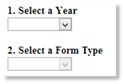
Once you have selected a company to work with, you will
select the Year and Form Type for which you want to import. If you are using a
company with existing forms, you will be presented with options to either
‘Replace’ the existing formset or ‘Append’ (add to)
the existing formset.

Next, upload your completed Microsoft Excel template file.
Click the ‘Browse’ button, locate your completed Excel file for import, and click
‘OK’. Then click the ‘Continue’ button.
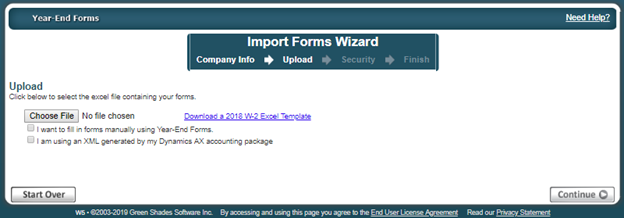
You may choose to skip the upload and
fill in forms manually using Year-End Forms by checking the checkbox (as seen
above), however for this guide we will continue with the uploading method.
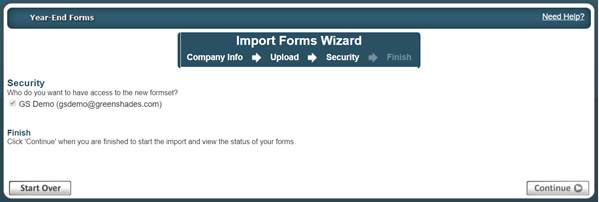
Next, you will be presented
with the option to grant access to administrators within your company to the
forms. If you do not already see their name and email address listed, you may
add them at a later time. Any administrators selected on this page will be set
as Super Administrators. See Section 1.1.3 to walk through how to set limited access administrators for formsets.
Once you’ve selected your
administrators, click ‘Continue’.
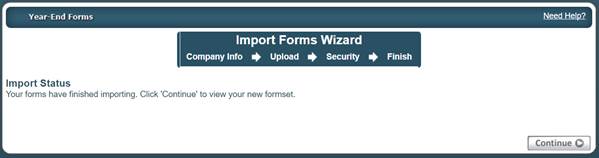
Year-End Forms will begin to import your forms. It may take some time to
import your data and create the formset based on the size of your excel file
and your position the queue.
If you remain on the current
screen, you will be provided with a ‘Continue’ button when your forms have
imported successfully. This will open the Welcome Wizard for your new W-2
formset.
If you leave the import
screen, your new formset will appear on your GreenshadesOnline.com workspace
homepage and will be listed as ‘New’ when it has completed and succesfully
imported. When you are ready, select the formset and complete the welcome
wizard as described in Section 1.3
below.
1.3
Configuring a New Formset
Once your form data has been uploaded into a new formset on Year-End Forms, authorized administrators can
start completing the year-end forms process.
Dependent on the form type you are uploading, the first time
that you log into the new formset on Year-End Forms,
you may be presented with a Welcome Wizard, which will walk you through some
setup steps for your new formset. As an example, the
steps for the W-2 Welcome Wizard are explained in detail below. Once completed,
you can return to the Welcome Wizard at any time from
the formset homepage by clicking the ‘Complete
Company Setup’ link.
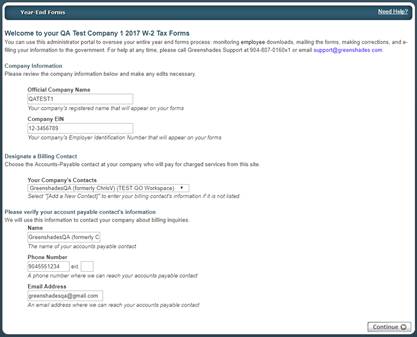
1.3.1 Company
Information
For the first step of the Welcome Wizard, you must verify
basic company information and designate a billing contact. This page will ask
you for your Official Company Name, EIN, and a billing contact. If the billing
contact drop-down list does not contain the person you wish to designate,
select ‘[Add a New Contact]’ to enter the correct contact’s information. Adding the appropriate billing contact is important, as
this will be the point of contact regarding billable services on Year-End
Forms, including:
·
Form Uploads
·
Mailing fees for the Greenshades Mail Service,
including preference charges, additional pages, and foreign postage
·
Federal E-Filing Services
·
State E-Filing Services
·
Form CD orders
1.3.2 W-2 State ID Validation
Only
available for W-2 formsets
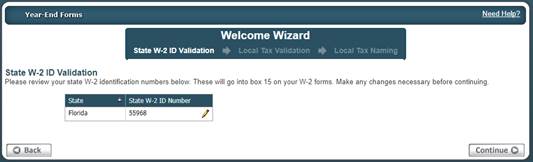
The W-2 Welcome Wizard will accept any State W-2 IDs that
were included with the state wages and taxes reported on your W-2 forms from
your source payroll package or excel template and will prompt you to verify
them. To assist you with this, Year-End Forms will provide you a list of all
the W-2 State IDs found within your data and warn you if any of these IDs are
not in the proper format. Please verify each ID for accuracy. You may edit an
ID by clicking the pencil icon and modify the ID in the text box provided. The
State’s ID will be updated on all W-2s, where applicable.
It is worth noting that if the ID is not correct, it means
that the ID stored in your accounting software is also incorrect. You should
ensure that you correct it at the source, as well as within this formset.
1.3.3 Local
Tax Validation
Only
available for W-2 formsets
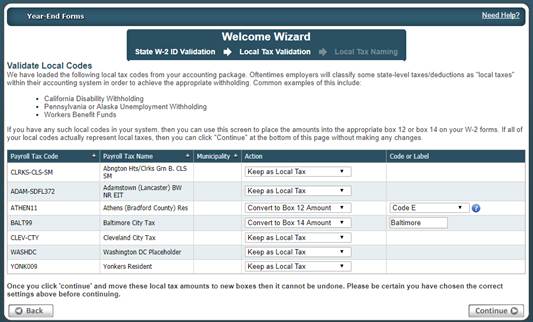
If your upload data contained local tax withholding
information, this next step of the W-2 Welcome Wizard will be the ‘Local Tax Validation’
page. Sometimes payroll administrators may store state level taxes or
complicated payroll deductions as local taxes within their payroll systems.
Some common examples are the California Disability Withholding (SDI), Alaska or
Pennsylvania Unemployment Withholding, various Worker Benefit Fund deductions,
etc. Since these taxes/deductions were stored as locals in the source payroll
package they will be loaded into the local boxes on your W-2 forms.
This step also allows administrators to map these deductions
to their correct Box 12 and/or Box 14 locations. The figure above shows an
administrator that will convert two of the incoming local tax codes into a Box
12 and Box 14 amounts, adding in the correct codes and labels respectively.
Once converted from a local code into another form, it cannot be undone. Any
locals that are not converted into a Box 12 or Box 14 amount will appear in the
‘Locals’ section of the W-2 forms.
1.3.4 Local
Tax Naming
Only
available for W-2 formsets
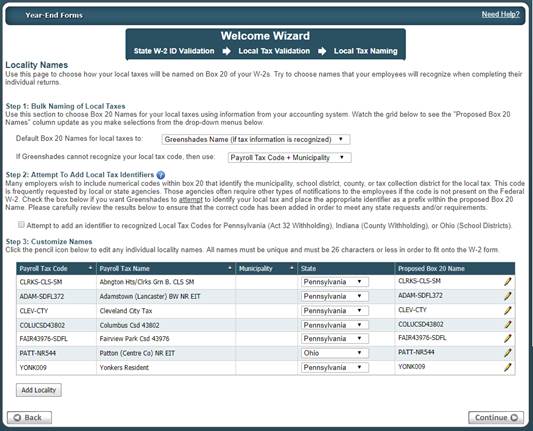
This step in the W-2 Welcome Wizard is once again specific
to administrators who are uploading tax forms with local withholding
information. This step allows the administrator to choose how each local
withholding code should be named when appearing on the W-2 form.
To begin, the administrator will select a bulk/default name
convention for all local codes. For example, choosing ‘Payroll Tax Code +
Municipality’ (as shown above) will label each local withholding amount with
your accounting package’s payroll tax code and municipality. Next, you can edit
the names of any individual local tax code to any desired label. The names for
local taxes are limited to 26 characters to fit onto the W-2 form and must be
unique.
For additional support please contact us.
(888) 255-3815 ext.1