3 Completing the Year-End Process
After ensuring the settings are accurate, the administrator is presented with a homepage that then assists the administrator in navigating through and completing the year-end process.
When viewing the formset homepage, there are two different views:
3.1 The Task-Driven View
By default, on completion of the Welcome Wizard, the Task-Driven Homepage is displayed and guides the administrator through the different steps/tasks that are recommended, in succession, while providing real-time updates as a checklist.
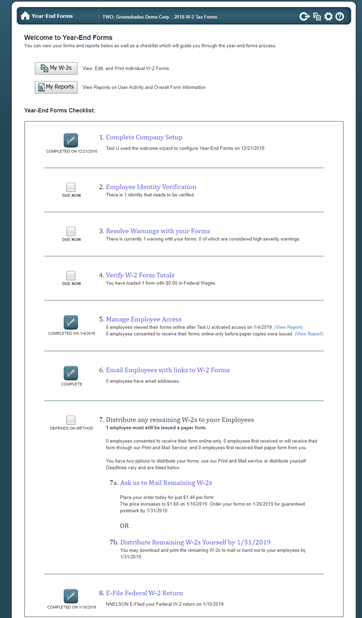
![]() The exact tasks within the
checklist will vary based on the form type loaded. Each task has a checkbox to
indicate whether it has been completed (except for limited administrators).
Clicking on the title of the task will take you to a wizard or page where you
can complete the task. When the task has been completed on the website, the
checkbox in your checklist will automatically become checked, with completed
date and administrator who completed the task, to indicate its completion.
The exact tasks within the
checklist will vary based on the form type loaded. Each task has a checkbox to
indicate whether it has been completed (except for limited administrators).
Clicking on the title of the task will take you to a wizard or page where you
can complete the task. When the task has been completed on the website, the
checkbox in your checklist will automatically become checked, with completed
date and administrator who completed the task, to indicate its completion.
It is important to note that limited access administrators
may see the checklist for all tasks, however without full access to fully
complete they may not be able to complete tasks themselves and the checklist
may not show as completed as a result.
3.1.1 Complete Company Setup
The Complete Company Setup task will be checked and
indicated as completed once you have completed the Welcome Wizard on import. If
you need to make any changes or updates to the information within the Welcome Wizard, click the ‘Complete Company Setup’
link to do so.
3.1.2 Employee/Vendor/Recipient Identity Verification
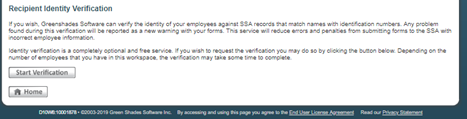
It is recommended that you consider submitting your vendors TINs or your employees’ SSNs to the IRS for verification. Year-End Forms will submit the names and SSNs/TINs of your recipients to the IRS for validation.
To submit your SSNs/TINs, click the ‘Start Verification’ button. Depending on the number of employees in the formset, the verification may take some time process and complete. The status of your Identify Verification batch will be displayed with the Status of Requested Verification grid.
Any discrepancies found by the SSA will be reported back through Year-End Forms as warnings and display within the ‘Employee’s Identities to be Fixed’ grid.
3.1.3 Resolve Warnings with your Forms
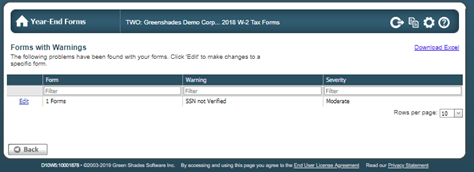
When you import or create forms, Year-End Forms will validate for potential issues. These potential issues are reported as warnings. Click ‘Resolve Warnings with your Forms’ within the checklist to review and resolve warnings. This page will provide a table of warnings, listing the Form, the Warning, and the Severity of each.
If the warning is related to a single form, the ‘Edit’ link takes you to the individual form and will allow you to review and correct the problem, if necessary. Otherwise, the ‘Edit’ link will direct you to a warning-specific page with instructions and the ability to resolve the warning. Resolving as many warnings as possible will help ensure the most correct and timely processing of your year-end forms and ultimately your E-File submission.
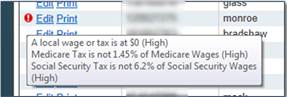 Additionally, when viewing your
forms as described in Section 2.3.1 above, you
will see a red exclamation point next to any form with a warning. Hovering over
the exclamation point will show you the warning details.
Additionally, when viewing your
forms as described in Section 2.3.1 above, you
will see a red exclamation point next to any form with a warning. Hovering over
the exclamation point will show you the warning details.
3.1.4 Email Employees with Links to Tax Forms
Only
available for W-2, 1095-C, and T4 formsets
Once Employee Access is enabled, Year-End Forms offers the ability for you to notify your employees of the online/electronic availability of their tax form(s). This is helpful for garnering as many electronic consents as possible, which decreases the amount of year-end forms you are required to distribute by paper. To notify your employees, use the Notification Wizard provided this step within the checklist.
3.1.4.1
Recipients
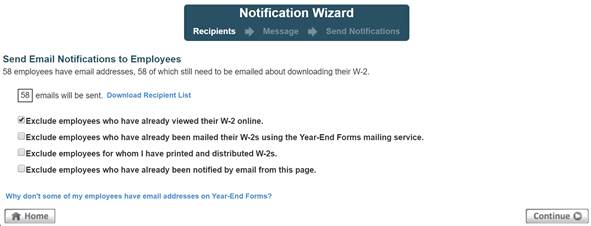
Designate which employees should receive the email notification. Year-End Forms offers multiple options to allow filtering the recipient list to only those employees who you want to notify. You can see the current recipient list in Excel by clicking ‘Download Recipient List’. To do this, you may select which employees to exclude by whether they have been notified or viewed their form already. For example, the recipient selection page allows you to:
· Exclude employees who have already viewed their W-2 online – This is checked by default and is helpful for excluding employees who have already viewed their W-2 online and do not need to be notified of its availability.
· Exclude employees who have already been mailed their W-2s using Year-End Forms mailing service – This option may be useful to exclude employees who have already been mailed their W-2s and may not need to access their form online.
·
Exclude employees for
whom I have printed and distributed W-2s – This option is useful to
exclude employees you have already printed and distributed
W-2s using the Download and Print Wizard.
· Exclude employees who have already been notified by email from this page – This option will exclude employees who you have previously notified using this Notification Wizard.
It is important to note that at
least one employee must have an email that was imported from Great Plains,
their GreenEmployee profile, imported through the Excel template, or manually
added to the employee’s ‘Login & Other Employee Information’ section to use
this feature. The link at the bottom of this page will answer why your
employees may not have email addresses on Year-End Forms.
3.1.4.1
Message
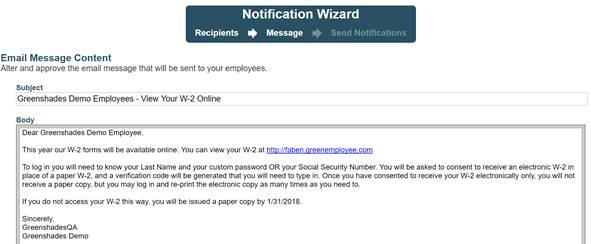
Once you have selected the recipients, you can compose the email message to send to your employees. Year-End Forms provides a default message you may use or you edit. If you wish, you can insert hyperlinks or images, as well as use bold, italics, and other rich text options.
Please make sure to keep the GreenEmployee.com webpage URL listed to link employees the correct login website.
3.1.4.2
Send
Notifications
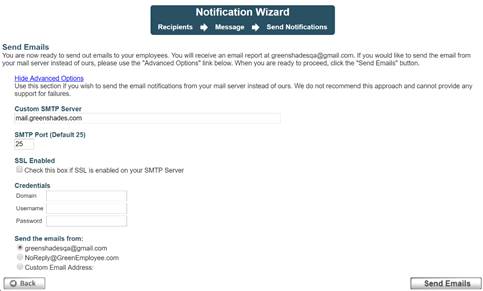
When you have completed the email message, proceed to ‘Send Notifications’ and click the ‘Send Emails’ button. An email report will be sent to the administrator’s email address.
An advanced option for sending the emails from your own mail server is also available. This may be preferred for your employee to receive the email from a familiar sender. To do this, click on ‘Advanced Options’ and complete the information. This option is only recommended for clients who are knowledgeable and experienced with mail server administration, as Greenshades cannot provide support for any failure in this circumstance.
3.1.5 Distribute any Remaining Tax Forms to your Employees
Whether you allow your recipients to view their tax form(s) electronically through GreenEmployee.com, at least some portion of your forms may need to be issued on paper to their recipients.
Greenshades offers two methods by which to distribute your tax forms by paper:
1) Ask Greenshades to Mail Remaining Forms
2) Distribute Remaining Forms Yourself (Download and Print)
Both distribution methods are discussed in greater detail and walkthrough in Section 4.
3.2 The Classic View
Administrators who are accustomed to older versions the year-end forms portal, may prefer using the Classic Homepage. To switch to the Classic View, click the link in the bottom left-hand corner of the homepage. While the Classic view allows the administrator to complete all necessary year-end tasks, it does not provide a checklist, so please ensure you are completing all year-end steps.
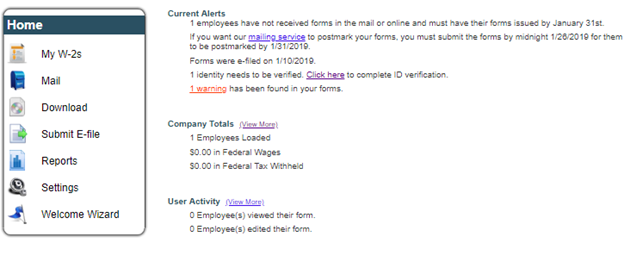
3.2.1 Left Side Menu
The left-side menu contains the traditional menu options supported by Year-End Forms, including:
· My [Tax Forms] – This menu option takes navigates to the ‘View Forms’ page.
· Mail – This menu option will navigate to the Mail Service Wizard, which displays all previous mail batches and allows the administrator to create a new one.
· Download – This menu option will navigate to the Download and Print Wizard, which displays all previous batches and allows the administrator to create a new one.
· Submit E-File – This menu option launches the E-File Wizard where the administrator can E-File State and Federal forms.
· Reports – This menu option opens the reports page where the administrator can generate several important data driven reports.
· Settings – This menu option allows the administrator to view and change the current settings for the formset.
·
Welcome Wizard – This menu option
launches the Welcome Wizard for this formset.
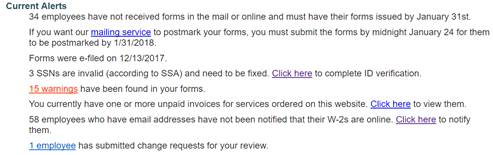
3.2.2 Current Alerts
The ‘Current Alerts’ section of the classic view provides critical information about important dates and tasks which have or must be completed. This section will also alert the administrator to any warnings with the forms and if any recipients have not been notified that their forms are available electronically through GreenEmployee.com. Based on the alert, links will be provided to allow you to access more information and/or address the alert.
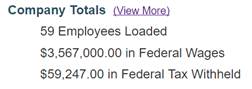
3.2.3 Company Totals
This section provides the total numbers for the formset. This may include employee/vendors loaded, total wages, total tax withheld, and other important total information. Clicking on ‘View More’ will take you to the full totals report.
3.2.4 User Activity
This section provides information about the latest user activity, including number of employees who have viewed their form and other activity based upon the form type. Clicking on ‘View More’ will allow you to select from several reports which provide more information.
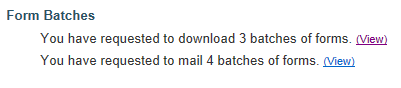
3.2.5 Form Batches
This section lists the batches of forms that an administrator has downloaded or sent to the Greenshades Mail Service. Clicking ‘View’ will take you to the Mail Service or Download and Print Wizards where you can view the previous batches and create new ones.